Tracking Your Printer Activity: A Guide to Viewing Document History on Windows 11
Tracking Your Printer Activity: A Guide to Viewing Document History on Windows 11
Quick Links
- Enable Printer History Logging for Recently Printed Documents on Windows 10
- Enable Printer History Logging for Recently Printed Documents on Windows 11
- Enable Long-Term Print History in Event Viewer.
- View Print History in Event Viewer
- Use Third-Party Print Logging Software
Checking the history of a printer to see what was printed can be somewhat difficult to monitor. As your toner level doesn’t convey how much the accessory has been used, you’ll need to enable logging within Windows 10 or Windows 11. Here are a few ways to do that.
Enable Printer History Logging for Recently Printed Documents on Windows 10
By default, your printed document history will be wiped after each document has finished printing. You can change this setting to enable you to see a list of your recently printed documents from the print queue for your printer. You’ll need to change this setting for each printer you have installed.
Access Your Print Queue to Enable Logging
To access your print queue, right-click the Windows Start menu button and select the “Settings” option. From here, click Devices > Printers & Scanners.
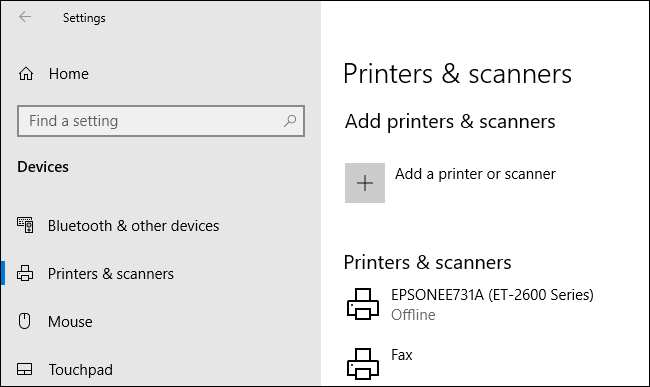
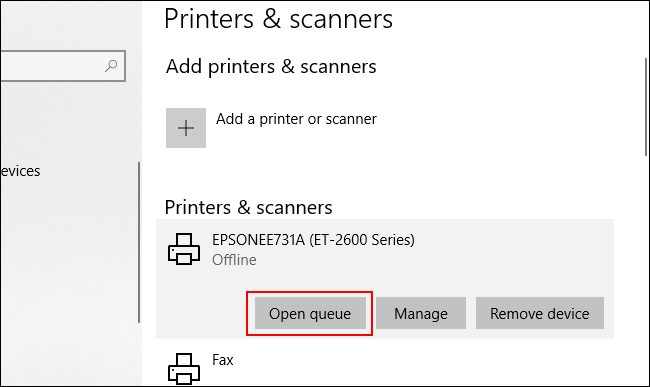
Find your printer in the “Printers & Scanners” list, click on it, and then click “Open Queue” to open the print queue.
Your printer queue with current and queued printed items will be listed. Documents you’ve previously printed will not be shown, which is why you’ll need to enable logging.
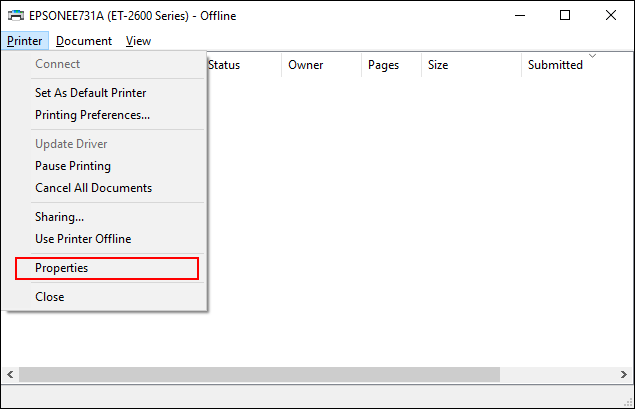
In the print queue window for your printer, click Printer > Properties. Alternatively, select your printer and click “Manage” in the “Printers & Scanners” settings menu.

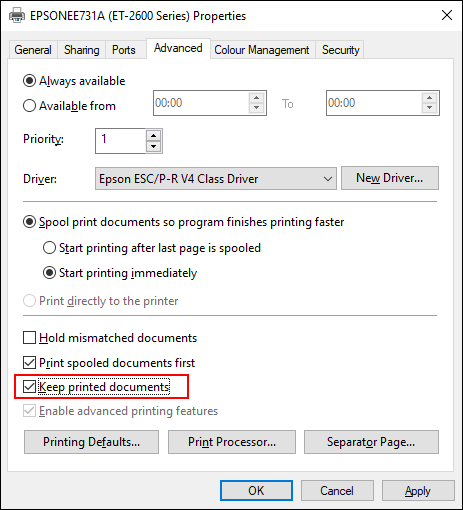
In your printer properties, click on the “Advanced” tab and then select the “Keep Printed Documents” checkbox.
Click “OK” to save your settings.
Once your document history is enabled, your documents will no longer disappear from your print queue after the printing process has completed.
Enable Printer History Logging for Recently Printed Documents on Windows 11
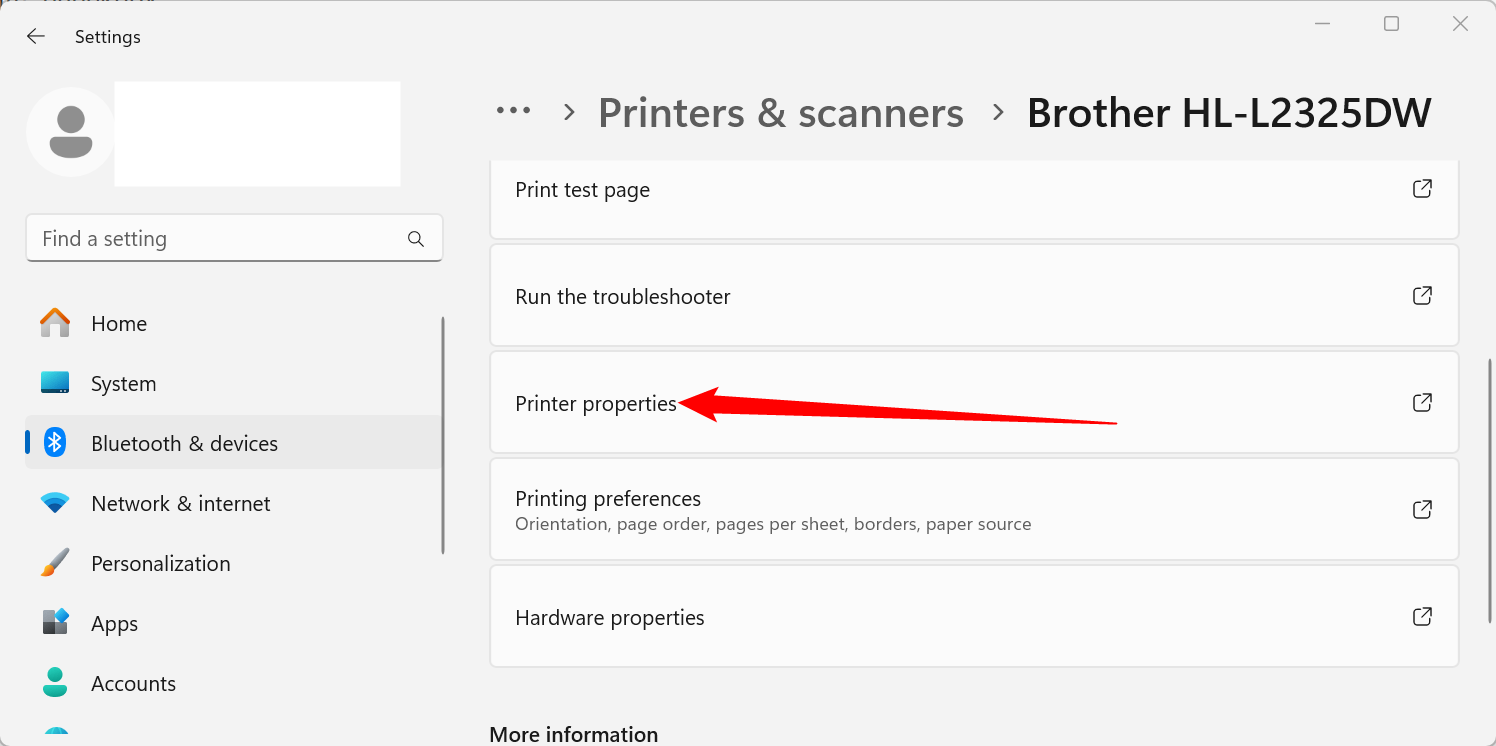
Windows 11 doesn’t enable a print history by default, much like its predecessor. To enable a short-term print history, press Windows+i or otherwise open the Settings app, then navigate to Bluetooth & Devices > Printers & Scanners, then select your printer.
Close
Scroll down and then click “Printer Properties.”
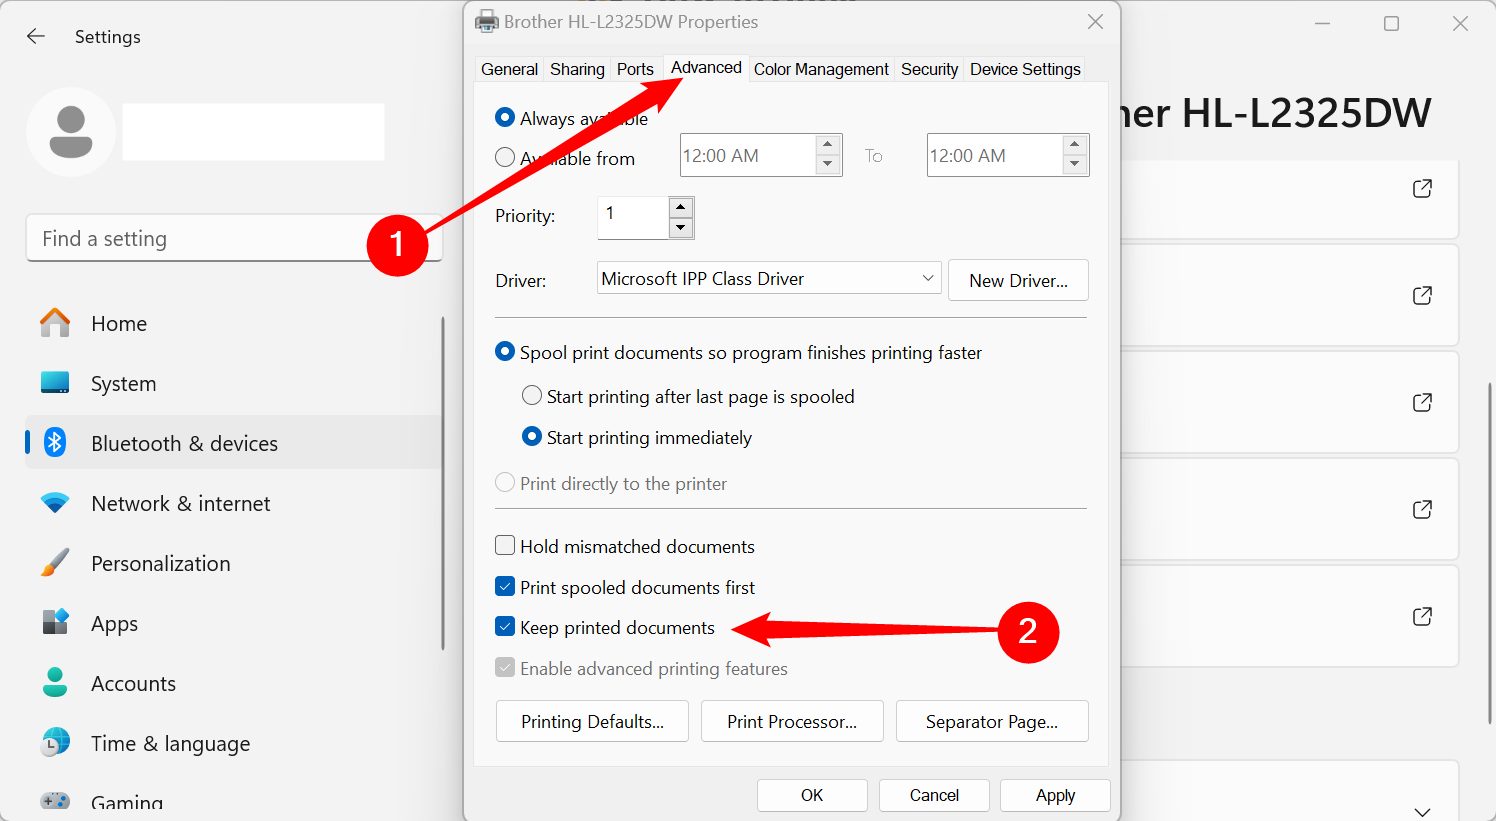
Select the “Advanced” tab, tick the box next to “Keep Printed Documents,” then click “Apply.” You can then close all the windows.
Whenever you want to review your print history, all you need to do is open to Settings > Bluetooth & Devices > Printers & Scanners, select your Printer, then click “Open Print Queue.”
Enable Long-Term Print History in Event Viewer.
The print queue will provide a short-term overview of your previously printed documents. If you want to view a long-term list, you’ll need to use the Windows Event Viewer.
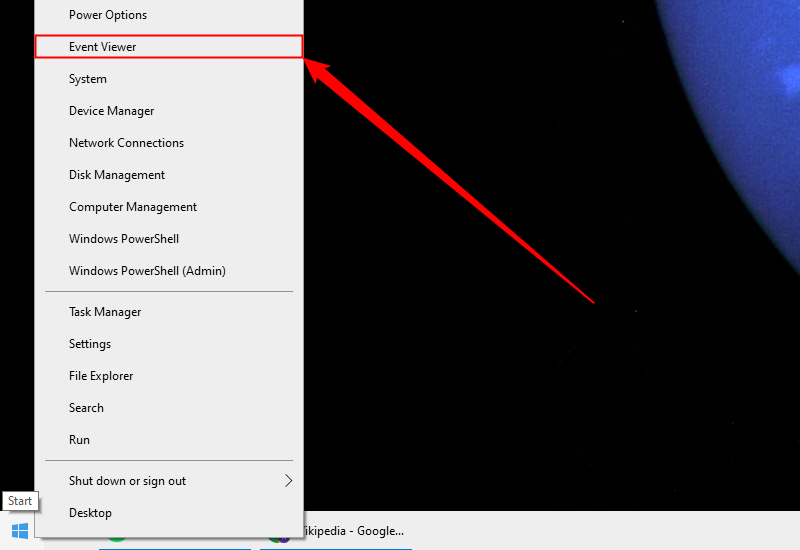
To start, right-click your Windows Start menu button and click the “Event Viewer” option.
The Event Viewer will allow you to view a list of previously printed files, but you’ll need to set Windows to begin logging your long-term printer history first. In the Windows Event Viewer, click Applications and Services Logs > Microsoft > Windows in the “Event Viewer (Local)” menu on the left.

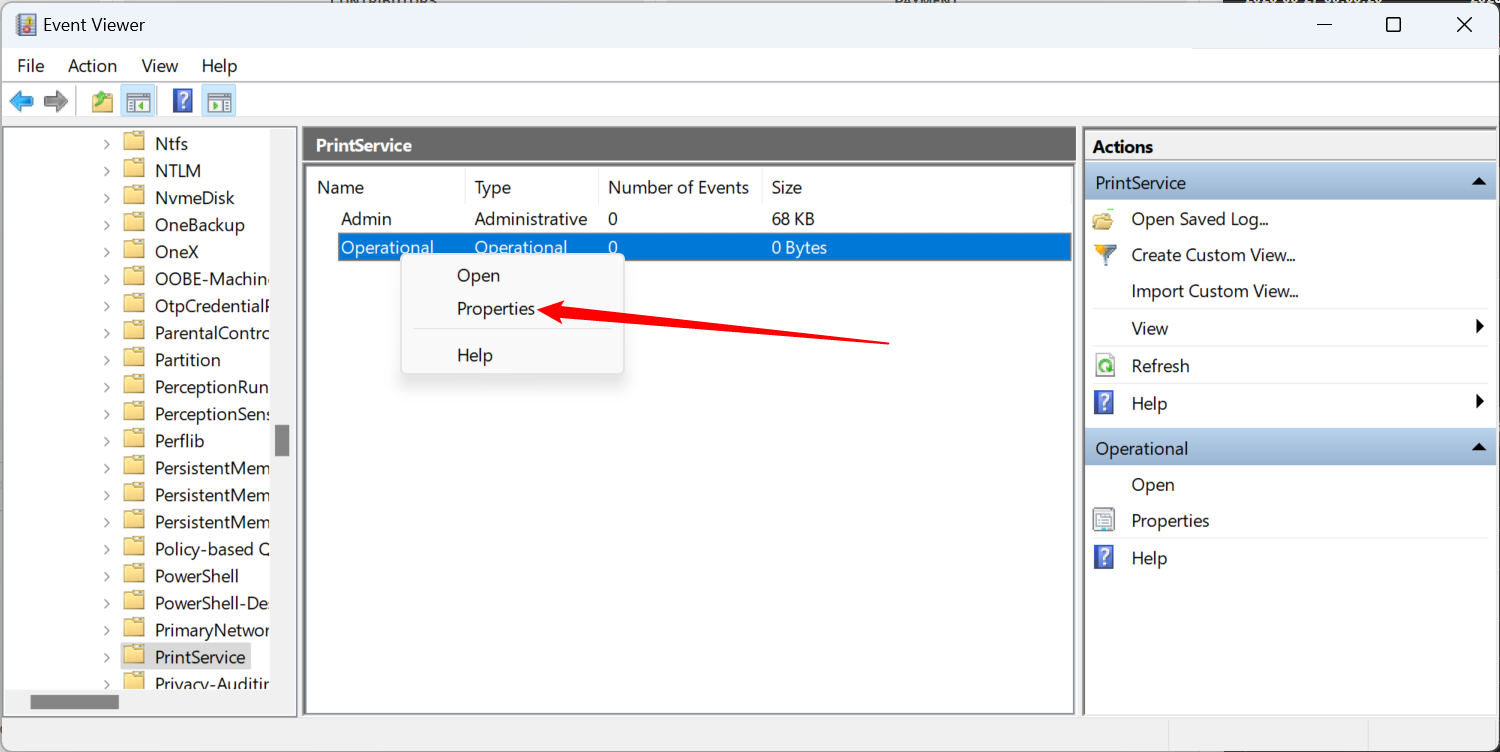
This will reveal a significant number of Windows services. Scroll down to find the “PrintService” category.
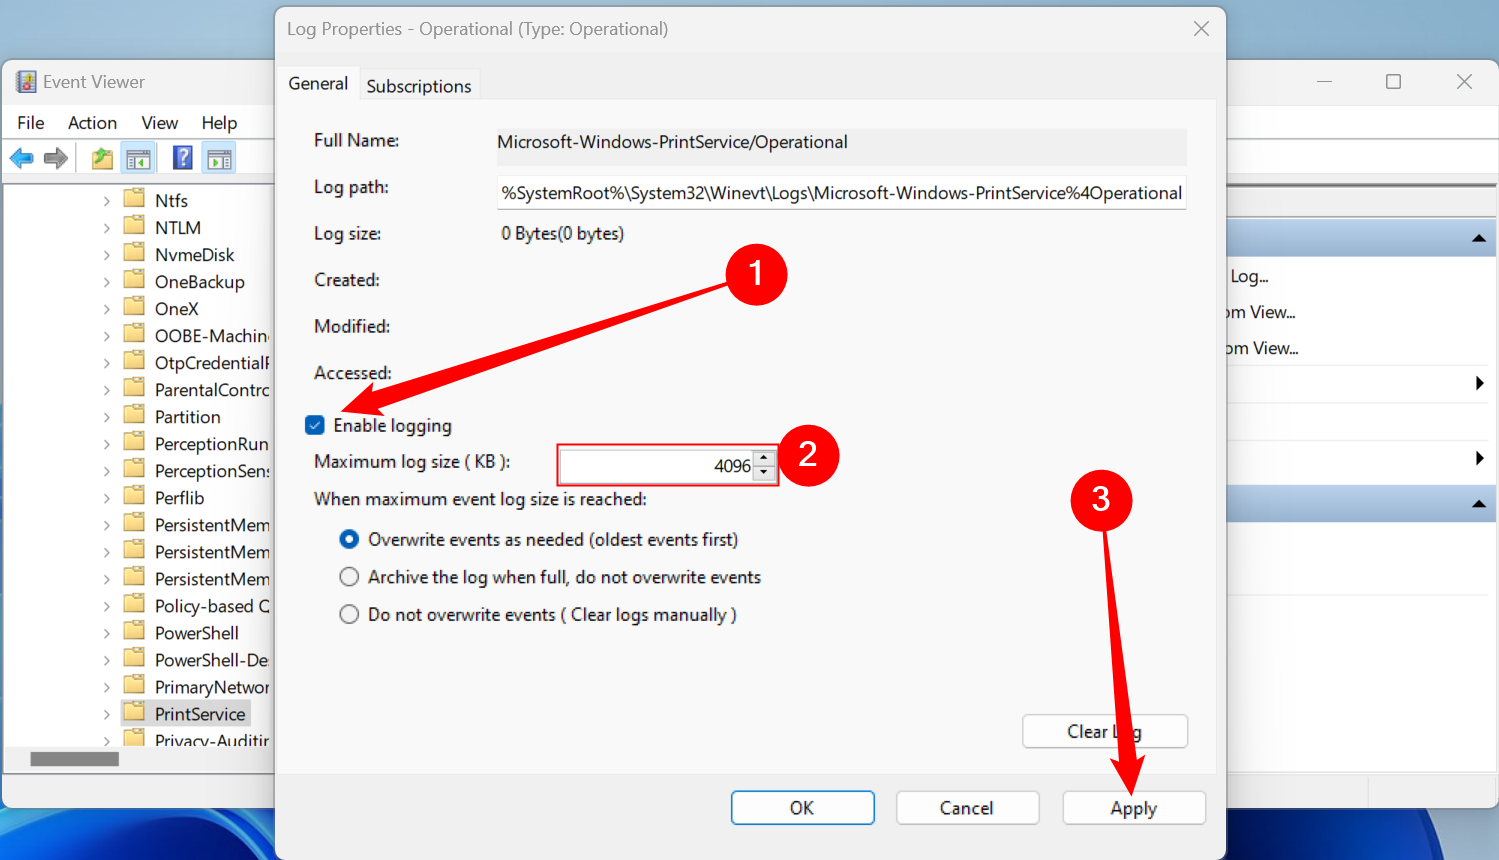
From here, right-click the “Operational” log and then click the “Properties” button.
Click to enable the “Enable Logging” checkbox and then set a maximum size for the log. The larger the size, the longer Windows will record your printed document history.
Click the “Apply” button to save the setting.
Windows will now automatically save the printer history for all of your installed printers to a log file that you can access within Event Viewer.
View Print History in Event Viewer
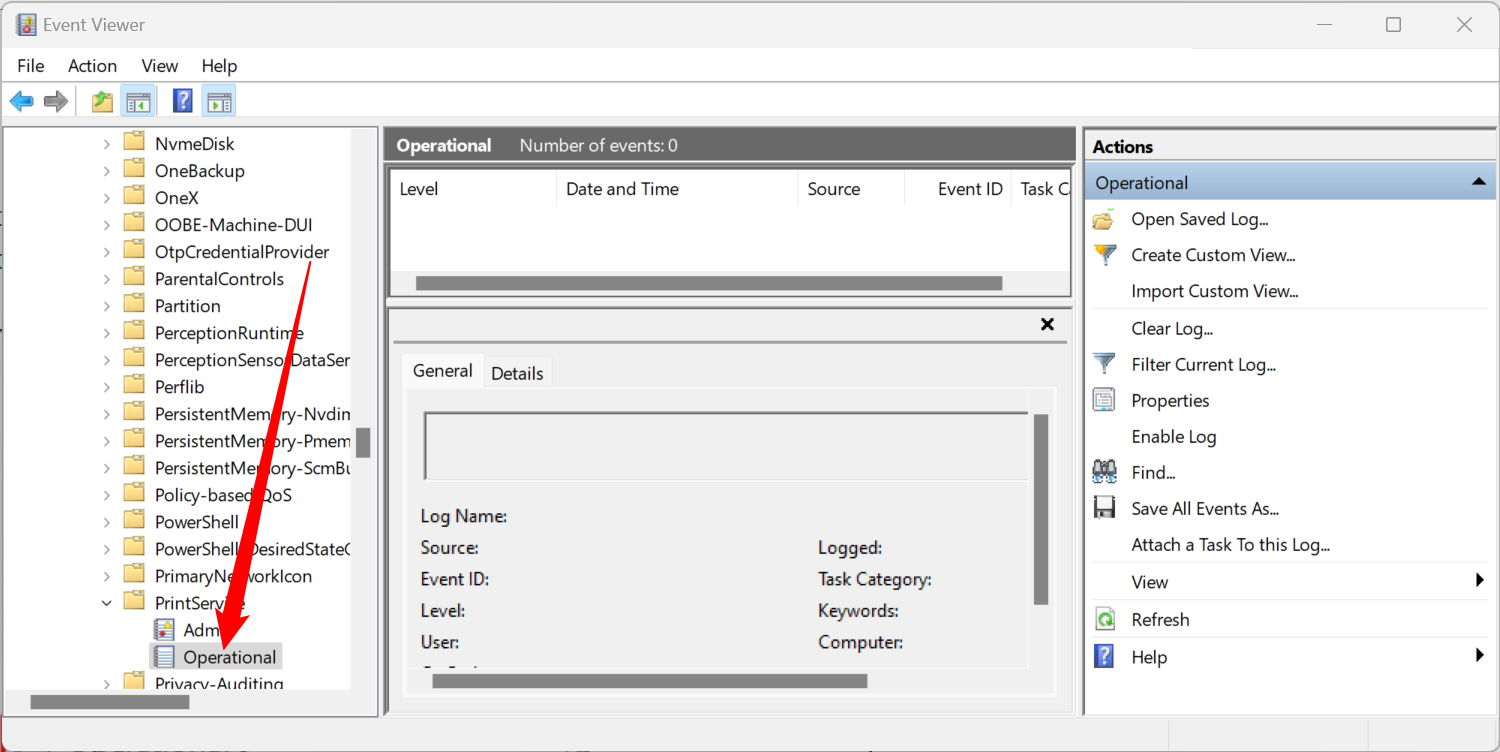
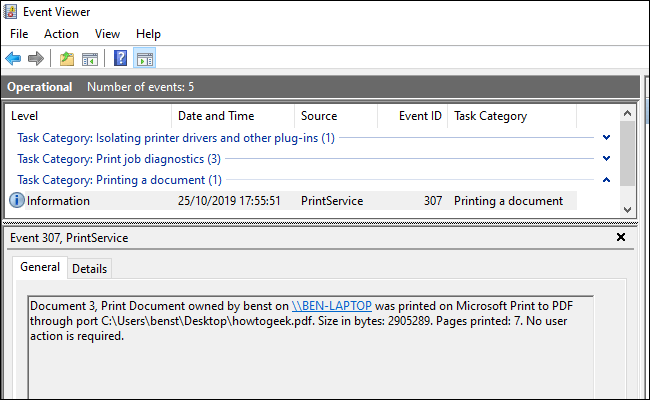
Once your printer history is enabled, you can access it at any time from the Event Viewer. To do so, find and open the “PrintService” category and then click on the “Operational” log.
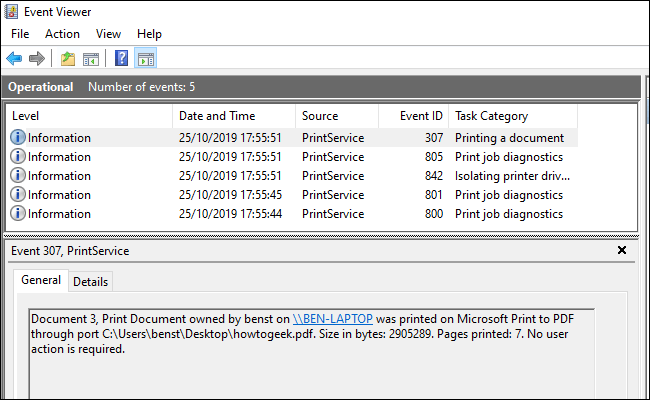
A history of all Windows printer events will be listed, from initial printer spooling to completed or failed prints.
Under the “Task Category” section, items listed as “Printing a Document” are documents that have been successfully printed. Failed prints will also appear in this category.
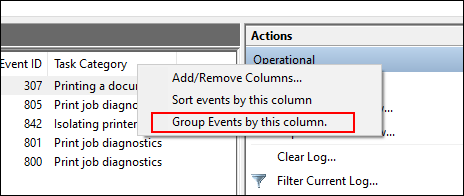
To make it easier to sort, you can group your print log by categories, making it easy to separate the “Printing a Document” events into their own section. To do so, right-click the “Task Category” heading and then click the “Group Events by This Column” button.
Your items will now be separated by category.
You can minimize the other categories, leaving the “Printing a Document” category to display only a list of your previously printed documents.
Use Third-Party Print Logging Software
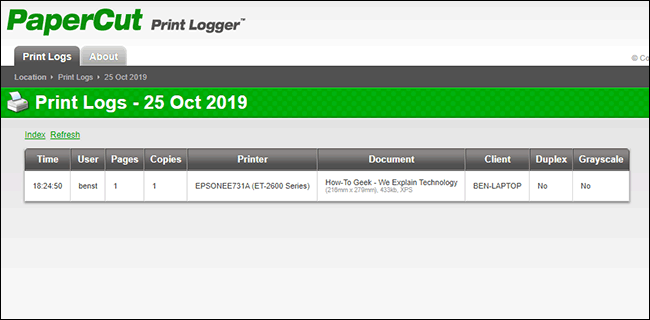
While the Event Viewer is functional, it doesn’t provide the clearest view of your printed documents. You can use third-party print logging software like PaperCut Print Logger to view your long-term printer history instead.
PaperCut Print Logger provides you with a time-stamped list of your printed documents, including information on the Windows user who printed the document, the document name, and the number of pages and copies.
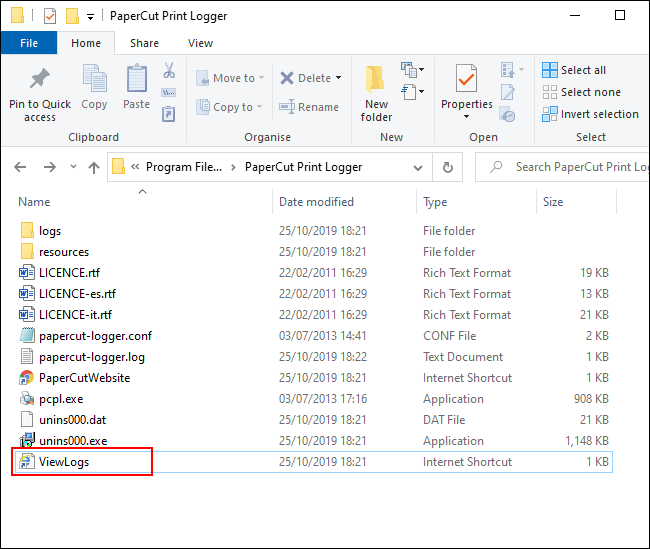
The admin page can be accessed from the default PaperCut Print Logger directory.
On Windows 10, this is usually C:\Program Files (x86)\PaperCut Print Logger . Double-click the “ViewLogs” shortcut to open the admin panel, where a list of your printed documents will be available, separated by date.
Once you’ve opened the PaperCut Print Logger admin page, under the “View” category, click the “HTML” button to access your print history for that date within the panel.
You can also click the “CSV/Excel” button under the “Date (Day)” or “Date (Month)” categories to export your daily or monthly print history as a Microsoft Excel XLS file.
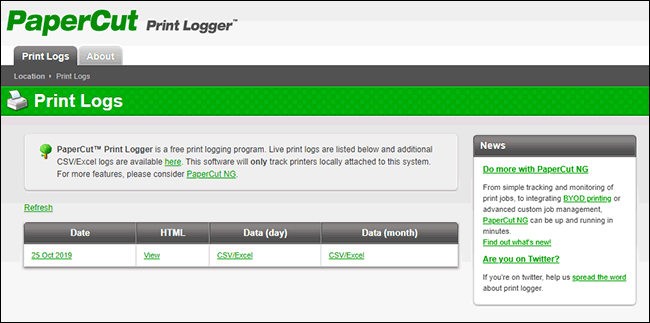
You can also access these logs from the Logs > CSV folder inside your PaperCut Print Logger installation directory.
Also read:
- [New] Seamless Media Consumption Enable Automatic Playback of YouTube Content on FB
- [New] Top 10 Tips Recording Your Youtube Livestreams
- Canon's MX492/MX560 Windows Driver Downloads: Fast Track for Seamless Printing Experience
- Easy Guide How To Bypass Tecno Spark 20 FRP Android 10/11/12/13
- Get Your NETGEAR Wi-Fi Card Updated with Easy Download & Installation Guide
- How to Bypass FRP on Motorola Edge 2023?
- How to Fix: MSI Afterburner Can't Recognize GPU in Windows 10 & 11
- How to Install Magic Mouse Controls on a Windows System Seamlessly
- In 2024, How to Fake Snapchat Location on Samsung Galaxy A25 5G | Dr.fone
- Quick & Easy Guide: How to Update or Download New Wi-Fi Drivers for Windows 7
- Quick Start: Setting Up Your Canon PRO 100 with Windows Driver [Step-by-Step Tutorial]
- Wie Deloitte Die Funktionalität Ihres eDiscovery Suites Erweitert
- Title: Tracking Your Printer Activity: A Guide to Viewing Document History on Windows 11
- Author: David
- Created at : 2024-10-14 17:42:44
- Updated at : 2024-10-20 16:07:35
- Link: https://win-dash.techidaily.com/tracking-your-printer-activity-a-guide-to-viewing-document-history-on-windows-11/
- License: This work is licensed under CC BY-NC-SA 4.0.