
Effortless Data Extraction From Images Into Excel Using Windows Tools

Effortless Data Extraction From Images Into Excel Using Windows Tools
Quick Links
If you have data from a physical source that you want to add to Excel, you have the option to snap a photo of it, save it to your computer, and upload the data into your sheet to save time.
The feature first introduced for Mac and mobile devices is now available in Excel 365 for Windows . It’s ideal for data in tables, receipts, or financials that you want to analyze and manipulate using Excel’s features. Rather than type the data in manually, let’s look at how to load it from a picture.
Load Data From a Picture
You can insert data from an image file saved to your device or available on your clipboard .

Select the sheet you want to use and head to the Data tab. Click the From Picture drop-down menu. To insert a saved image, choose “Picture From File” or to insert one from your clipboard, choose “Picture From Clipboard”.

If you choose a picture from your device, locate your image, select it, and pick “Insert.” If you choose one from your clipboard, it automatically begins loading.

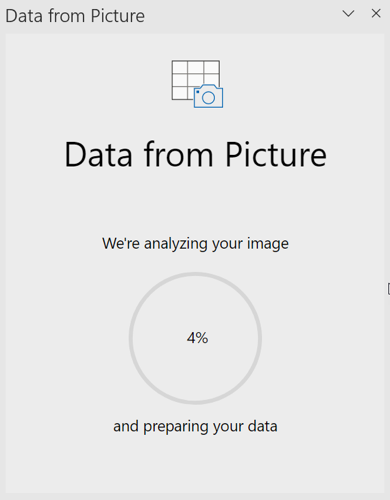
A sidebar should open on the right side of the spreadsheet showing the progress as the data is extracted.
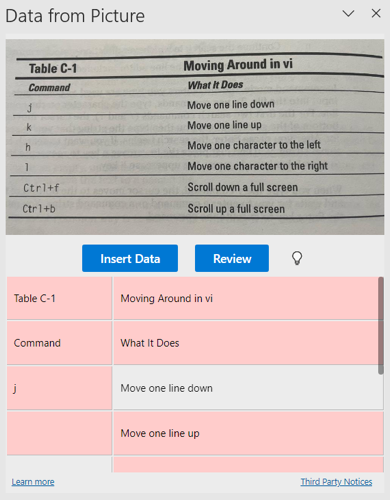
When complete, you’ll see the image at the top of the sidebar with the data beneath it.
Review and Edit the Picture Data
You may need to make slight edits to the data if it didn’t import correctly. This can include certain sets of symbols or even letters and numbers. You’ll see these fields shaded in pink, but you can also edit those in gray as needed.

When you select a field in the table, you’ll also see that section highlighted in your picture.
Choose a field in the table that you want to edit, make your change in the box that appears, and click “Accept” to adjust the data.

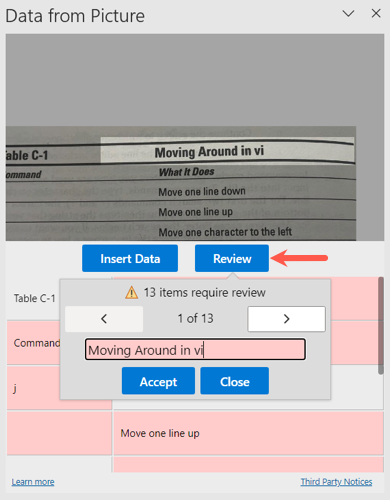
Alternatively, you can move through each field one at a time by clicking “Review.” You’ll then see each highlighted field open one-by-one for you to make your changes. Click “Accept” when you finish with each edit to move on to the next.
Insert the Picture Data
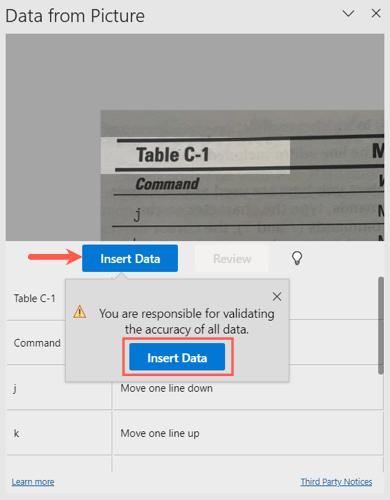
When you have reviewed and edited all necessary data from the picture, you can select “Insert Data” in the sidebar to place the data in your spreadsheet. You may then see a prompt letting you know that you’re responsible for the accuracy of the data. Click “Insert Data” to continue.
The data then appears in your spreadsheet and the sidebar closes. From there, you can manipulate or make any additional changes you want to the data in your sheet.

Having the ability to load data from a picture into Excel is a terrific alternative to replicating the data manually.
For more ways to save time in Excel, look at how to use themes for colors and fonts or how to create chart templates you can reuse.
Also read:
- [New] 2024 Approved 2023 | Facebook Video Downloader Application for Mobile/Win/Mac
- [New] Elevate Your Livestream Game Twitch & YouTube via OBS for 2024
- [New] In 2024, Streamline Your Slide Share Experience with Webcam
- [Updated] Expert Video Capture Maximizing Performance with Logitech Webcam Tech for 2024
- 2024 Approved Triggering Windows 11 HDR in Dynamic Mode
- Approach: Explain How the W/C Ratio Affects Concrete Properties.
- Best Practices for Downloading ASUS Chipset Drivers on Windows PCs
- Comprehensive Google Pixel
- Download Drivers for Canon MF8500C Printer: Compatible with Windows 7, 8.1 & 10
- Download Updated HP Printer Drivers for Windows 10 and 11 Users
- Easy Guide: Installing Official Dell Screen Mirroring Software on PC or Laptop (Windows Only)
- How to Get & Install New Graphics Drivers on Your HP 840 G3 Device
- In 2024, Full Guide on Mirroring Your ZTE Nubia Flip 5G to Your PC/Mac | Dr.fone
- Level Up Performance: Tuning the ASUS RX 970 for Gamers
- Pivotal Moments in Figure Skating '22 Highlights for 2024
- Quick and Easy Synaptics Touchpad Driver Installation Guide
- Solving the Issue: Why Your iPhone's Calendar Doesn't Sync with Outlook and How to Correct It
- Step-by-Step ASUS Touchpad Driver Setup for Windows 11 Users
- Unlocking the Full Potential: A Beginner’s Guide to Free Nvidia
- Title: Effortless Data Extraction From Images Into Excel Using Windows Tools
- Author: David
- Created at : 2024-10-14 18:23:25
- Updated at : 2024-10-20 18:38:50
- Link: https://win-dash.techidaily.com/effortless-data-extraction-from-images-into-excel-using-windows-tools/
- License: This work is licensed under CC BY-NC-SA 4.0.